
Last updated August 25, 2026 · Editorially reviewed by CanzarTV
How to Choose and Place Acoustic Treatments for Better TV Audio in Small Rooms
Getting clearer dialogue, tighter bass, and fewer distracting echoes in a small TV room is often less about upgrading your speakers and more about treating the room. This guide explains how to choose the right acoustic treatments for small spaces, where to place them, and how to check results with practical, low-cost methods.
Why room acoustics matter for TV audio
Speakers and soundbars produce sound, but the room shapes what you actually hear. In small rooms, sound reflects quickly off nearby walls, ceiling, and floor. Those reflections can:
- Blur dialogue clarity and stereo imaging
- Create comb filtering and frequency dips/peaks
- Make bass uneven or boomy
- Produce long or audible echoes (flutter)
Proper acoustic treatment reduces unwanted reflections and taming room modes so that the audio you hear from your TV, soundbar, or AV receiver is closer to what the content provider intended.
Acoustic treatment basics: absorption, diffusion, and bass control
Before buying anything, understand the three core treatment types:
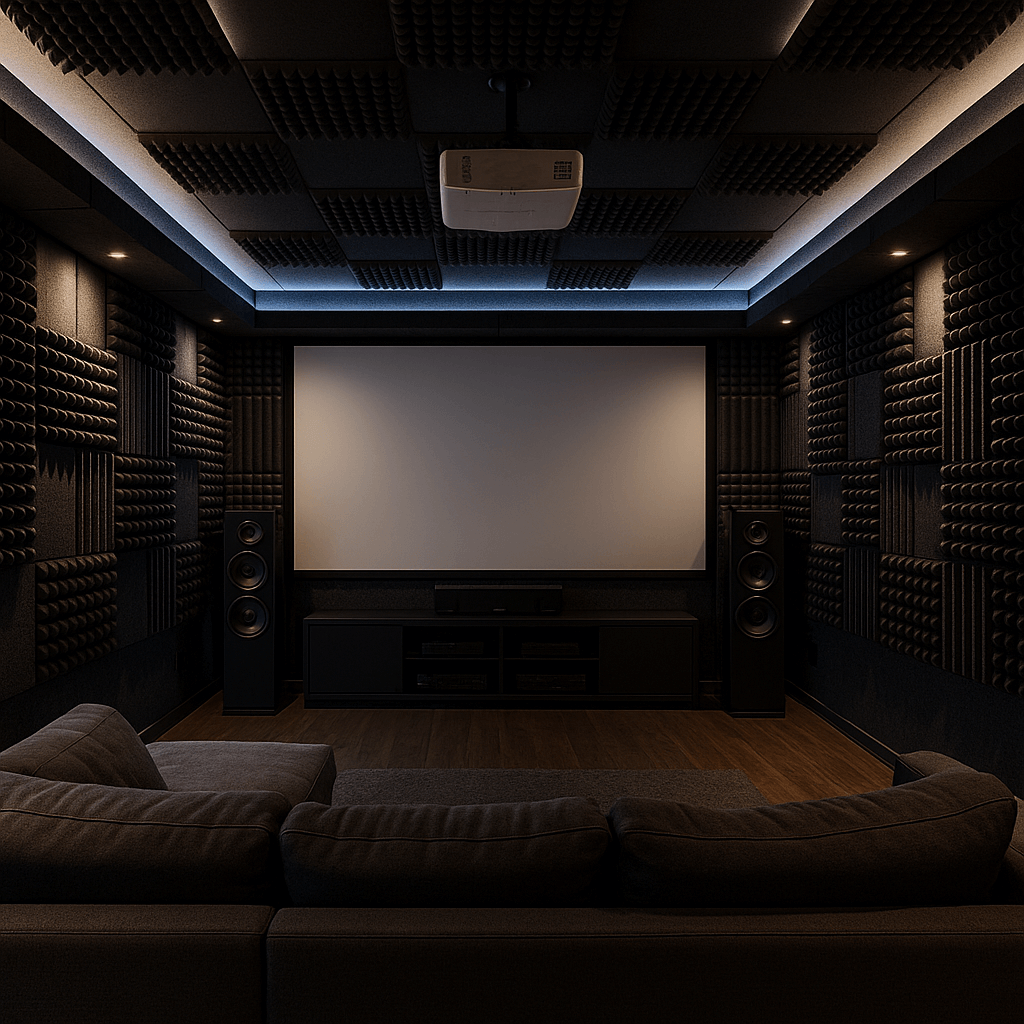
- Absorption: Materials (foam, mineral wool, fiberglass) that convert sound energy into heat, reducing reflections across mid and high frequencies. Useful for flutter echoes and improving dialogue clarity.
- Diffusion: Shapes (wood or plastic diffusers) that scatter sound instead of absorbing it, preserving liveliness while reducing discrete reflections; often overkill in very small rooms where absorption is typically more effective.
- Bass control: Dense absorbers or tuned bass traps address low-frequency room modes that cause boomy or recessed bass. In small rooms, bass issues are common and often the most audible problem.
Tip: In living-room style TV setups, lean toward absorption and bass traps first; add diffusion only if you want a more live acoustic and the room is larger or heavily treated.
How much treatment do you need in a small room?
There’s no one-size-fits-all percentage — room size, shape, speaker positions, and listening distance matter. For small TV rooms (roughly 10–20 m² / 100–215 ft²):
- Start with treatment on the primary reflection points (about 4–6 panels). These yield the biggest improvement for the smallest cost.
- Add bass traps in the front and rear corners (2–4 pieces) if bass sounds uneven or boomy.
- If you want a fuller solution, aim to cover 15–30% of wall surface area with absorptive material distributed across the room. This is a general guideline, not a rule.
Remember: Too much broadband absorption can make a room unnaturally dead. Aim for balanced control so dialogue stays clear but audio still sounds natural.
Choosing panels and traps: materials, thickness, and NRC
- Panel materials: Acoustic foam is cheap and effective for high-frequency absorption but less efficient in mids. Fiberglass or mineral wool (rockwool) panels offer broader absorption and are common in DIY and commercial panels.
- Thickness: Thicker panels absorb lower frequencies better. In small rooms, 50–100 mm (2–4 in) panels are a common, practical choice — thicker traps (100–200 mm) are better for bass corners.
- NRC and absorption data: Manufacturers sometimes publish NRC (Noise Reduction Coefficient) or octave-band absorption data. These help compare products, but real-room performance will vary. If data isn’t available, prioritize reputable materials (rigid mineral wool, high-density fiberglass) and verified suppliers.
- Finish, safety, and aesthetics: Fabrics and frames improve looks. Ensure materials are safe (non-toxic, fire-rated to local codes). If you have pets or small children, consider fabric-encased panels.
Placement: where to put panels, traps, and diffusers
Prioritize the following placement steps, from highest impact to fine-tuning:
Primary reflection points (left/right walls): Sit in your main listening spot. Have a friend hold a mirror flat to the wall and move it along the side walls. Wherever you can see the TV (or speakers) in the mirror from the listening spot is a reflection point — place panels there at ear height.
Early reflections from ceiling: For mounted TVs or low ceilings, place a ceiling panel between the listening spot and the screen. Small suspended clouds or ceiling tiles are effective.
Rear wall behind the listening position: Use absorptive panels to reduce reflections that smear imaging and dialogue.
Front wall around the TV: Treat walls behind and beside the TV to reduce first-reflection energy from the display and speakers.
Corners (bass traps): Place bass traps in vertical corners (floor-to-ceiling) and along wall/ceiling corners for low-frequency control. Even one trap per front corner can help significantly.
Floor treatments: Thick rugs or carpets reduce floor reflections. Combine with absorption on low walls if the floor remains reflective.
Symmetry: For stereo setups, try to treat both sides similarly to maintain balanced imaging.
Practical installation tips
- Mounting: Many panels come with Z-clips, adhesive Velcro, or simple brackets. For rented spaces, consider removable wallpaper-friendly adhesives or freestanding panels.
- Spacing: Panels mounted a few centimeters off the wall increase low-frequency absorption. For ceiling clouds, suspend them 50–150 mm (2–6 in) below the ceiling for better performance.
- Aesthetics: Fabric-wrapped panels, printed art panels, or panels behind floating shelves can disguise treatment in living rooms. Avoid placing panels directly on radiators or over vents.
- DIY options: DIY panels using mineral wool, wood frames, and acoustic fabric can be cost-effective. Ensure safe handling of insulation materials and follow local fire and building safety guidance.
Measuring and tuning: how to know if it’s working
You don’t need a professional rig to see improvements, but a few measurements help:
- Listening tests: Use familiar dialogue-heavy scenes and music you know well. Note improvements in clarity, reduced echoes, or more consistent bass.
- Smartphone apps and measurement tools: Room EQ Wizard (REW) with a calibrated USB microphone provides reliable measurements. There are smartphone apps for quick checks of reverberation or frequency response, but treat their results as indicative, not definitive.
- Listen for specific issues: Flutter echoes (quick, metallic repetitions) respond well to small, thin panels on parallel surfaces. Bass resonance (uneven low end) needs corner traps or equalization.
If you use equalization (room correction in an AV receiver or soundbar): apply EQ after treating the room — acoustic treatment reduces the amount of EQ needed and produces more stable results.
Comparison: common treatment options for small TV rooms
| Option | Pros | Cons | Best for |
|---|---|---|---|
| Foam panels (2–4 in) | Affordable, easy to mount, good for high/mid reflections | Limited low-frequency absorption | Quick, entry-level reflection control; reduce echoes TV room |
| Fiberglass/mineral wool panels (2–4 in) | Broadband absorption, better mid control | Heavier; need frames/fabric | Living room acoustic panels; improve dialogue clarity with treatment |
| Thick corner bass traps (4+ in) | Better low-frequency control | More expensive, bulky | Tackles boomy bass in small rooms |
| Cloud/ceiling panels | Targets ceiling reflections, unobtrusive | Can be more installation work | Rooms with low ceilings or mounted speakers |
| Diffusers | Preserve live feel while reducing reflections | Large; often unnecessary in small rooms | Larger dedicated rooms seeking a more natural acoustic balance |
Use the table to decide where to spend your budget. For most small TV rooms, start with wall panels at reflection points plus at least basic corner traps.
Budgeting and step-by-step plan for small rooms
- Starter (low budget): 4–6 foam panels at reflection points, 1 rug, basic rear-wall panel. Expect noticeable reduction in echoes and clearer dialogue.
- Mid-range (balanced): 6–10 mineral wool panels (2–4 in) at reflection points, 2 corner bass traps, ceiling cloud or rug. Good all-around improvement.
- Full treatment (higher budget): More panels distributed for 15–30% coverage, multiple corner traps, ceiling treatment, measurement and tuning. Best for critical listening and large families who want consistent results.
Step-by-step:
1. Identify listening position and speaker locations.
2. Place panels at side-wall reflection points and a ceiling panel if needed.
3. Add at least one pair of corner traps at the front corners.
4. Re-assess by listening; add rear-wall panels to tighten imaging.
5. Measure with a microphone/app if you want objective feedback.
6. Apply light EQ only after acoustic treatment.
Aesthetics and living-room considerations
Many small TV rooms double as living rooms. To keep decor cohesive:
- Choose fabric-wrapped panels in colors or prints that match the room.
- Use art-style acoustic panels (prints over absorptive material) behind the TV or on large walls.
- Freestanding panels and bookshelves filled with mixed materials can provide partial diffusion/absorption while fitting the room’s style.
- Keep safety in mind (securely mount panels above seating, avoid covering heat sources or vents).
When to call a pro
Consider professional acoustic consultation if:
- You’re building a dedicated home theater and need precise control.
- You have complex bass issues after basic treatment.
- You want a bespoke, discreet install that integrates with room architecture.
A pro can model your room, recommend targeted bass traps, and produce a treatment plan that balances aesthetics and performance. For many casual TV rooms, however, DIY along the steps above is effective and cost-efficient.
FAQ
Q: Will acoustic panels make my TV room completely silent?
A: No. Panels reduce unwanted reflections and tame reverberation, but they don’t stop all sound. You’ll still hear the program, and some liveliness is desirable. The goal is clearer, more natural audio, not silence.
Q: Can I use just a rug and curtains to improve TV audio?
A: Rugs and heavy curtains help reduce floor and window reflections and are a good first step. They won’t address mid/low-frequency room modes—panels and bass traps are still needed for full improvement.
Q: How many panels do I need to improve dialogue clarity?
A: Start with 4–6 panels at primary reflection points and add a couple at the rear or behind the TV as needed. For dialogue clarity, mid-frequency absorption is most effective.
Q: Are foam panels effective?
A: Acoustic foam works well for high-frequency absorption and can reduce echoes, but mineral wool/fiberglass panels generally perform better across mid frequencies and are often preferred for voice clarity.
Q: Can I rely on EQ instead of acoustic treatment?
A: EQ can help with frequency bumps and dips, but it can’t remove early reflections or flutter echoes. Treat acoustically first, then use EQ sparingly for fine-tuning.
Q: Will treatment affect surround or immersive formats (Dolby Atmos, DTS:X)?
A: Proper treatment improves clarity and imaging for any format by controlling reflections and room modes; however, speaker placement and calibration remain important for immersive formats.
Conclusion
Improving TV audio in a small room is more about the room than the speakers. Start by treating the main reflection points and adding basic corner bass traps. Choose broadband absorbers (mineral wool or fiberglass) for best mid-frequency performance, and use ceiling treatment or rugs where reflections are pronounced. Measure or rely on careful listening to guide additional treatments, and apply any electronic equalization only after the room is acoustically improved.
If you’re unsure where to begin, a small, targeted investment in panels at reflection points usually delivers the most audible benefit per dollar. For more detailed setup suggestions, see Devices & Setup and practical ideas on Blog. If you use apps to measure room responses or run calibration tools, check Apps & Tools for related coverage.
Disclosure: Settings and compatibility can differ by TV, audio device, operating system, region, and firmware version. Verify specific instructions and safety data with the manufacturer and local regulations.

Canzar
Ready to stream? Pick your plan
Live TV, movies, sports and 10,000+ channels on any device — Firestick, Android TV, Smart TV, phone.
View Subscription Plans Compare Pricing
Moderation: Comments are reviewed before publishing. Be respectful and on-topic.
Guidelines: Share streaming tips, device help, or content recommendations. No spam, no promotions, no off-topic links.